


There are many factors that contribute to a successful flooring installation – subfloor preparation, a quality product, the right adhesive and following manufacturer’s instructions. There's one other step that, when overlooked, can lead to failure - moisture testing and mitigation. Concrete must always contain some moisture, but it cannot be an excessive amount; when it is, the moisture levels can cause floor coverings to fail.
It’s important to understand the testing process on concrete subfloors and the implications of moisture on flooring performance, in order to plan project timelines and budgets accordingly, and to keep end users happy.
When is a moisture test necessary?
If the flooring is going over any type of concrete subfloor, regardless of age and grade level, it is essential to conduct a moisture test (per ASTM F710).
What are ASTM moisture tests and standards?
Moisture in concrete should be measured by an anhydrous calcium chloride test kit per the ASTM F-1869 test method or by using an in-situ probe test for relative humidity (RH) per the ASTM F-2170. Three tests must be performed for the first 1,000 sq. ft. and one for every 1,000 sq. ft. thereafter.
Anhydrous Calcium Chloride Test (ASTM F1869): This test determines the Moisture Vapor Emission Rate (MVER) that passes through on- and above-grade bare concrete floors. With this test, a small amount of calcium chloride is weighed and then sealed on top of a properly prepared slab for 72 hours. During that time, the calcium chloride will absorb the moisture from the slab. After 72 hours the calcium chloride is weighed again, and the added weight is calculated to determine the moisture vapor driven through the subfloor. The amount of moisture is expressed as the rate of MVER, measured in pounds of moisture of a 1000 sq. ft. area during a 24-hour period.
In-situ Probe Test (ASTM F2170): During an in-situ probe test, the test area is properly prepared per ASTM F2170 instructions. Test holes are drilled, three for the first 1000 sq. ft. and one for each additional 1000 sq. ft. Holes are drilled to the proper depth of the slab, per ASTM F2170. Once drilled and cleaned, the probe liners are inserted in the hole, covered, and left to equilibrate for 24 hours. Then the probe is inserted, and a reading is taken once the probe reaches the same temperature as the slab. Results are expressed as a percentage of relative humidity. It’s important to note that the results only tell the condition of the slab at the time of the test and for that specific location.
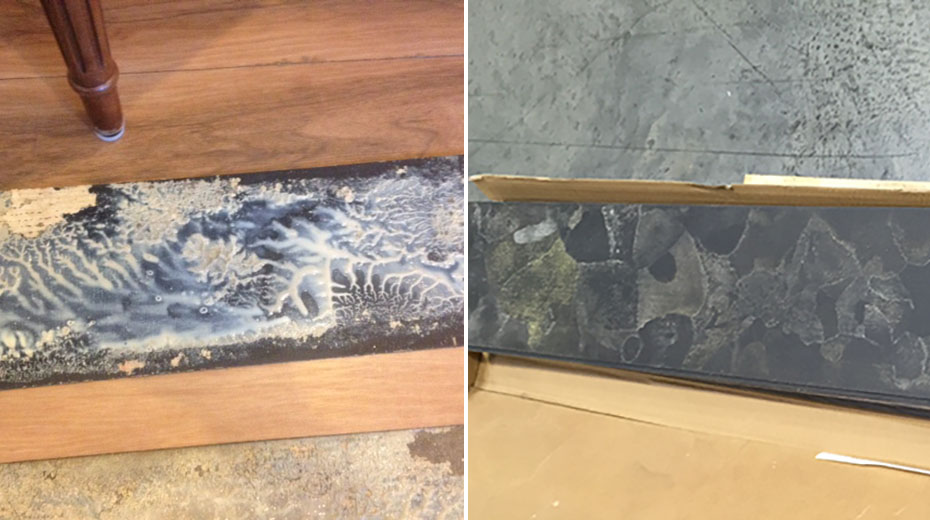
Excess moisture from a slab can affect the integrity of flooring adhesives (left) and can cause mold or mildew growth (right)
What about the “plastic sheet test?”
You may be familiar with what’s known as the “plastic sheet test.” With this method, a square piece of plastic is taped onto the concrete slab for at least 16 hours. The theory is if there is any moisture in the slab, it will show on the underside of the plastic sheet; however, this is not always true. If moisture is present on the sheet, then there is definitely a moisture problem. But if there is no moisture on the sheet, that does not necessarily mean the slab is acceptable to install over. This test only measures the moisture level at the surface of the slab, not within it, so failures could occur in the future. Because of this, we do not recommend performing the plastic sheet test.
What constitutes a moisture “problem?”
This depends on the moisture tolerance of the specific floor covering and/or adhesive specified. For Karndean Designflooring gluedown LVT, we offer adhesives that can be used over subfloors of up to 95% RH or 10 lbs. Calcium Chloride; and our loose lay and rigid core products can be installed over subfloors with an RH up to 95%. Note: adhesives can be used as a moisture barrier, but they do not mitigate moisture.
How is subfloor moisture mitigated?
Moisture mitigation stops the steady flow of moisture passing through a slab. These systems will reduce the amount of moisture vapor transmission (MVT). On an existing slab, the typical method of moisture mitigation is an applied barrier. Consult the flooring manufacturer for recommendations.
With Karndean Designflooring products, we recommend the use of Kovara™95 and Kovara™MBX. With these products the membrane is rolled over the slab and taped at the seams. This allows for flooring installation on the same day as moisture mitigation, saving time and money. These products are mold and fungus resistant.
What happens when a moisture problem is ignored?
If a moisture problem is not taken care of, it is only a matter of time before it will cause the floor covering to fail. Signs of an un-mitigated moisture problem include:
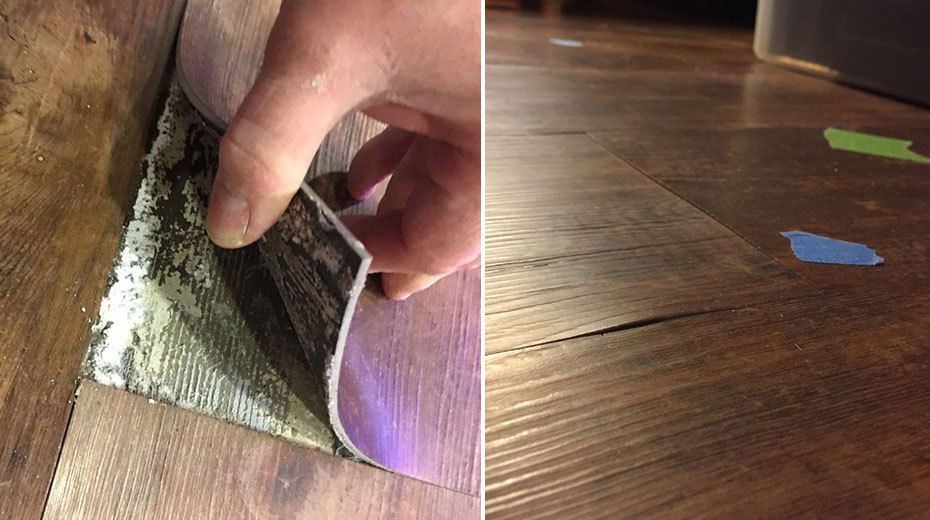
• Delamination (When the surface layer separates or lifts from the rest of the plank or tile.)
• Bubbling
• Warping
• Cupping
• Mold/Mildew Growth
Although moisture testing and mitigation require extra time and planning upfront, it is crucial to the success of a luxury vinyl installation and will save you and the end user time and money in the long run. It’s important to remember that mitigation is not the same as remediation, and while mitigation allows for the installation of LVT, nothing about the floor covering itself will fix a moisture problem.